What Is Golden Hour and How Do I Shoot for It?
Golden hour refers to a time of day when there is a specific kind of natural lighting from the sun. This usually occurs during sunrise or sunset on a clear day when the sun is angled from 4 degrees below to 6 degrees above the horizon. The sunlight has a diffused warm tone at this time and can create beautiful natural lighting for your photographs.
Here are some tips on how to shoot for golden hour:
Plan ahead for golden hour by checking when it will occur.
You will need to shoot on a day with a relatively clear sky. Full clouds or rain will block the golden hour lighting so check the weather when deciding what day you will shoot on. Determine the exact time that you should be shooting at by checking www.golden-hour.com for the day on which you will be shooting.
Choose the right location
There are two things you must plan for when deciding on a location for your golden hour photoshoot. First, remember that the sun rises in the east and sets in the west. You will need to have sun exposure coming from the right direction depending on if you are shooting for the sunrise golden hour, or the sunset golden hour. Second, make sure that your shooting location has adequate sunlight. If you are blocked by a building or surrounded by trees you will not be able to take advantage of golden hour. An open field often works well for this.
Bring a Tripod
Golden hour light is a more diffused light than regular day lighting, so you may need to use longer exposure times for some shots. In case you find that handheld photos are blurry or too dark during golden hour, you will need a tripod to take longer exposure shots without experiencing blur from shaky hands.
Keep shooting
Golden hour is not a guaranteed 60 minutes of warm light. How long it lasts can vary greatly. While the lighting is right just keep shooting as you never know when a cloud will cover the sun. Take advantage of golden hour when it occurs as it can end up being a very small window of time.
White Balance Presets
If the camera you are using comes with white balance options, try setting your camera to cloudy or shade white balance settings. This will make the warmth of the photo truly stand out.
Take advantage of both directions of sunlight
You can shoot using the golden hour sun in two ways. One is having your subject face the sun, and take photos of them with the warm tones hitting your subject. The other option would be to have your subject stand with the sun behind them, and take a photo with the sun acting as a backlight. Both options can make beautiful photos so take advantage of these poses while you have golden hour light.
When your subject is facing the sun
If you are shooting a person and you have them facing the sun, turn your back to the sun and take a photo with the warm glow lighting them. You may need to have the subject look down or to the side in the photo, or have their eyes closed in order to prevent squinting in the photo or damage to their eyes. Remember, looking directly into the sun is very bad for your eyes, so we recommend never having your subject do this!
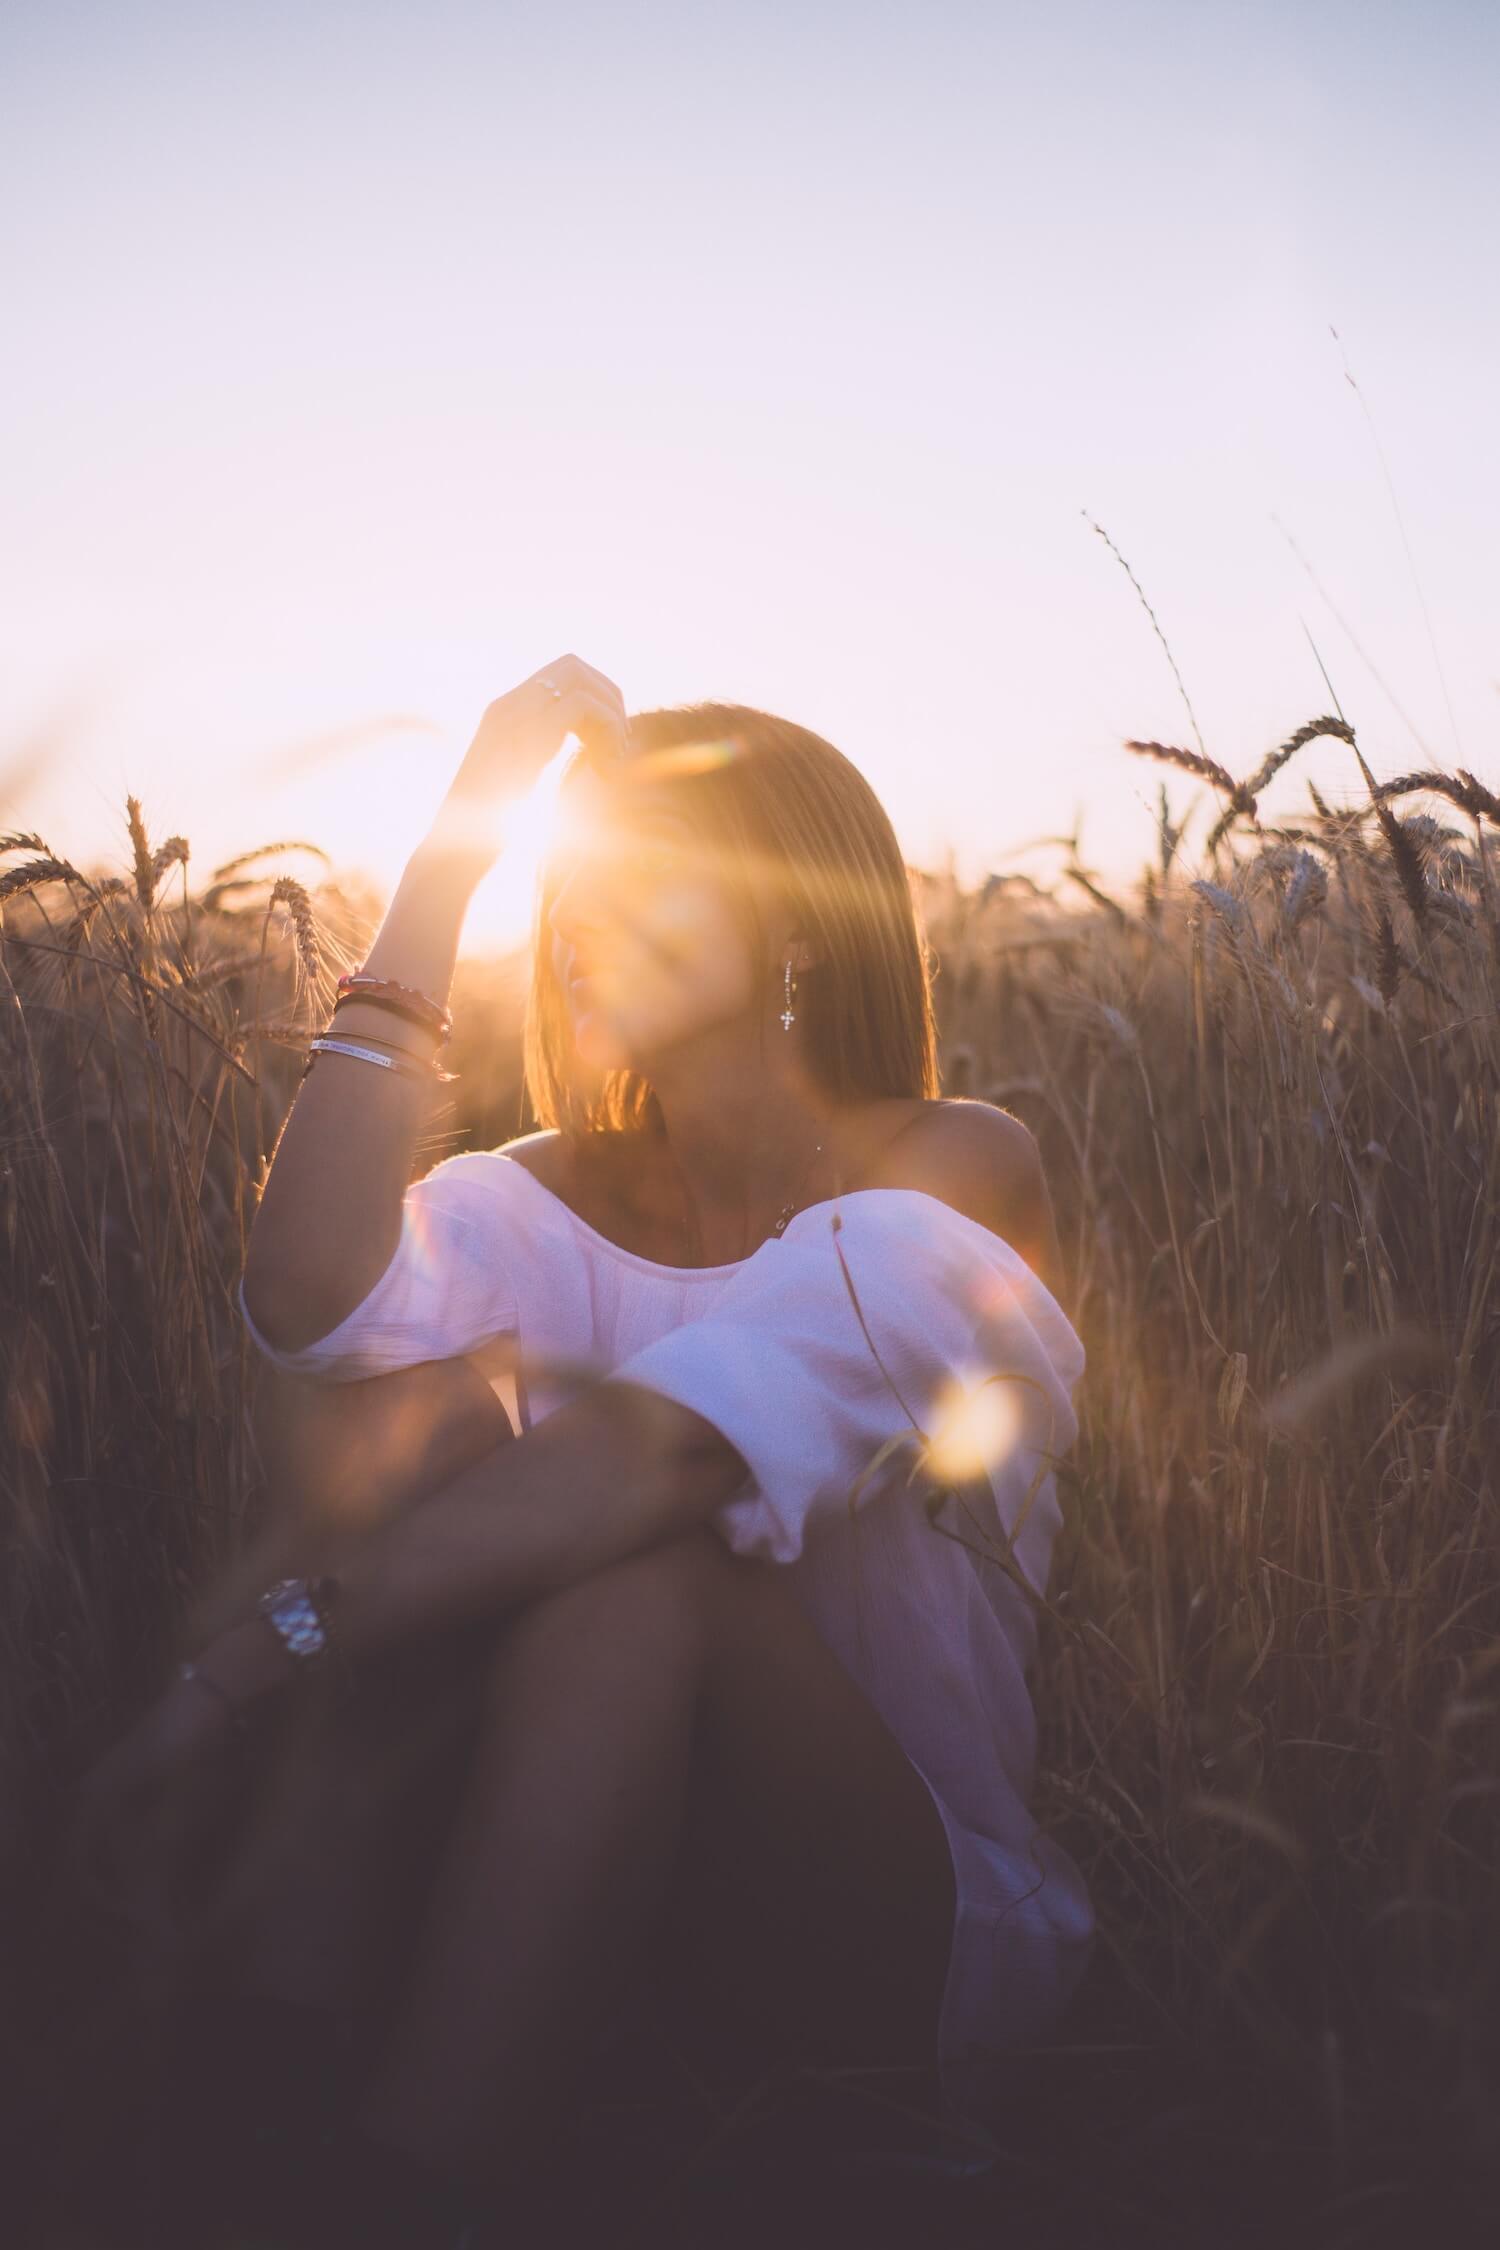
When the sun is your backlight
Don’t have your subject cover the sun completely or they will be entirely silhouetted. Take your photo with them only partially covering the sun, so that sun rays and light will be shown in the image as well as light the subject partially. Also remember that when you are facing your subject and their back is to the sun, you will be facing the sun directly, do not look directly in the sun as this is very bad for your eyes!
We hope this article helps you to get the perfect golden hour shot, and remember, never look directly into the sun as it can damage your eyes!
-- article by: Cynthia Banks